How to insert and remove Watermark?
We are going to learn how to insert watermark behind the text in Microsoft Excel, and it is going to be done in a step by step format.
Watermarks are adding to create letters and templates so that when we enter data or write a letter it will always be displayed in the background.
Sometimes the companies write the company names in the background of their important documents. Sometimes we use the confidential watermark.
How to insert a watermark?
Start by opening a new book and let us first learn to add a watermark in Excel. You have the document ready, and want to put a watermark behind it.

Note: You do have to create the text image you would like to put behind the text.
Click on Insert tab, then Text, and finally Header and Footer.

Click on pictures. Browse your files to locate the picture of your choice.

Note: The pictures automatically shows on top after clicking on the header and footer in the previous step.
Click on any of the text column, and the picture will show behind the text.

Click on Picture that shows when you click on the header.

Click on Design and Format Picture.

Note: Click on design if it does not automatically show.
Click on picture.

Click on the arrow beside color and choose washout.

How to get rid of a watermark?
Removing the header
Now we are ready to learn to remove the watermark from the sheet.
It is almost the same procedure: Pagelayout > go to the header and where ever picture is printed just click the backspace to remove it.
The same as watermark was added, this time the watermark will be deleted.
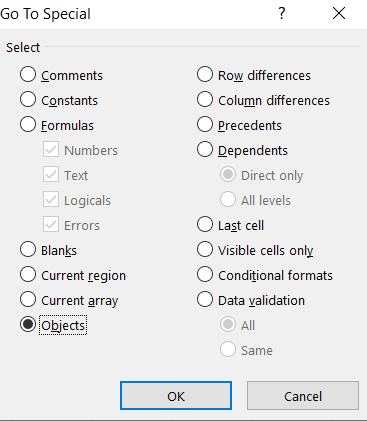
Go to Special
Another way to remove a watermark is by Go to Special Excel functionality.
Please notice that a watermark is just an object in Excel. Go To Special will help you to highlight the objects in your worksheet.

After using this option the watermark wil be selected. By clicking Delete keyboard button the Watermark is gone.
Delete Background
The last method may be the most convenient way for deleting watermarks.
In most cases, watermarks would be added as backgrounds. That’s wonderful info for you.
Excel offers dedicated ribbon option of removing Backgrounds.
Go to Page Layout. When Delete Background button will be available for you, just use it.
Voila! A watermark is removed from your spreadsheet.


Leave a Reply