How to Insert a Header and Footer in Excel for Printing and Page Setup
In Microsoft Excel, headers and footers let you add text like page numbers, file names, or dates to the top or bottom of every printed page – perfect for reports, printed sheets, or formal documents. In this lesson you can learn how to insert header and footer to your spreadsheet. You may need it when you are printing spreadsheet.
Inserting Headers and Footers
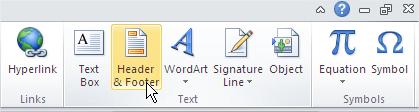
To add a header or footer in Excel, go to the Ribbon, click the Insert tab, and in the Text group, select Header & Footer. This switches your worksheet to Page Layout view.

After clicking “Design”, a contextual tab appears, providing customization options.
You can insert common elements into your Excel header or footer – such as page numbers, file paths, sheet names, or even your company logo. You may also notice that the program automatically divides the sheet into the page (looks a bit like a print preview).

The Header & Footer Tools Design tab includes four key sections for customization:

- Header and Footer – buttons allow you to insert a ready-made system headers and footers.
- Header and Footer Elements – the individual elements that can be inserted anywhere in the header or footer:
- Page Number – inserts the current page number of the document,
- Number of Pages – inserts the total number of pages in the sheet,
- Current Date – inserts the current date (it will change from day to day),
- Current Time – inserts the current time (also changes),
- File Path – inserts the file path on the disk,
- File Name – insert the name of the file that contains the given sheet
- Sheet Name – insert the name of the current sheet
- Image – insert any graphics from the disk (eg, logo, symbol, etc.).
- Navigation – the ability to quickly move between footer and header on the page.
- Options – Additional options:
- Different First Page – select this option and the items added to the header or footer on the first page will be different from the other pages of the document,
- Different Odd & Even Pages – headers and footers are divided into two types (for odd and even pages). Changes made on either side will change them in all odd-numbered pages. The same way in the even-numbered pages,
- Scaling with Document – the option is applicable only for scaling the size of the document to print
- Align with Page Margins – setting the edge of the header and footer to the left and right margin of the page.
To return to the standard worksheet view after editing your headers and footers, navigate to the View tab and, within the Workbook Views group, click Normal.

Advanced Applications: Scale Your Excel Impact
You’ve mastered this advanced technique. Now it’s time to integrate it into professional workflows, build automated systems, and apply these skills to strategic business challenges. Our specialized learning hubs show how top professionals combine multiple techniques to create enterprise-grade solutions.
🚀 Scale Your Expertise:
- Excel Business Intelligence & KPI Dashboards – Combine multiple advanced techniques into interactive dashboards. Learn how enterprises track performance across entire organizations.
- Excel Data Analysis & Statistics – Apply advanced Excel alongside statistical rigor. Build predictive models, forecasts, and data-driven decision systems.
- Excel for Financial Analysis & Investment Strategy – Use these techniques for sophisticated financial modeling, valuation analysis, and portfolio optimization.
These hubs are designed for professionals ready to take their Excel skills to enterprise level. Explore the hub that matches your industry and unlock the full potential of Excel-based analysis and automation.


Leave a Reply