How to run a SQL query in Excel VBA
In this Excel VBA tutorial lesson, you will see how to Run the SQL statements in Excel.
Let us create Sample database as follows:
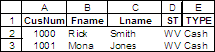
A customer table named CUST:

An order table named ORD:

A sales rep table named SREP:

Like standard relational tables, these have certain fields in common.
Open another workbook where you will create your Excel report. Choose Data, Import External Data, New Database Query, which launches the Choose Data Source dialog box.

The first time you access a database, including a workbook database, you’ll need to create a new Data Source. To do so, select the <New Data Source> line, and then click OK.
In the first edit box of the Create New Data Source dialog, give your data source a name that will remind you what it is connected to. This is the name you will select from a list when you create new queries later.

The item asks you to select the driver type. Because Excel is the source of data for this exercise, select the Excel driver shown from the drop-down list.

Use this dialog to navigate to the workbook that will serve as your data source. Here, OEDATA.xls contains my Order Entry Data. Select the workbook from the list.
Choose OK to accept your Database Name selection. In the ODBC Microsoft Excel Setup dialog, choose OK to return to the Create New Data Source dialog. This dialog now shows the path to your Excel workbook that acts as your database.
Choose OK to return to the Choose Data Source dialog. Note that the Data Source you just created is already selected in the list.
Make sure the check box at the bottom of the dialog, “Use the Query Wizard to create/edit queries” is NOT checked. The Query Wizard can help if you are doing very simple queries, but I want to show you more powerful features of the program. You can experiment with the Query Wizard later, if you like.
Now that you’ve defined an Excel workbook as a relational database, you can use it in queries.
Create a Query
The Choose Data Source dialog now includes the data source (MSQuery–Excel) that we’ve defined for the OEDATA.xls workbook. Choose OK to use this data source. This data source will appear each time you access the Choose Data Source dialog.
After you choose OK, Excel displays both the full-screen Microsoft Query application window and the Add Tables dialog. You will use these tools to specify what data you want returned, either by pointing and clicking, or by pasting an SQL statement into the SQL window. For this example, we’ll use the point and click method.
In the Add Tables dialog, double-click on each of the tables you want to add. Notice that all of the named ranges appear here.

For this example, let’s add all of the tables. To do so, select each table in turn, and then choose Add or double-click. Doing so displays them in MS Query, as shown here. After you’ve added each table, close the Add Tables dialog.

The grey pane near the top of this figure is called the Tables pane. The white area at the bottom is called the Data pane. When you execute the query, the data will be returned to a grid in the Data pane.
The middle pane is called the Criteria pane. It isn’t visible by default. To see the Criteria pane, choose View, Criteria. You also can choose the Show/Hide Criteria button, shown here, to toggle whether this pane is visible.
Now, let’s join the tables shown in the Tables pane.
The matching field in CUST and ORD is CustNum. Click on CustNum in CUST, and drag it to CustNum in ORD. When you drop, a line will appear, joining the two tables.
The matching field in ORD and SREP is SalID. In a similar fashion, connect the SalID field between ORD and SREP.
Now, let’s use these tables to create a query.
Suppose we’re interested only in sales in West Virginia. In that case, you would restrict the returned data set to just the records where the ST (state code) field in the CUST table is equal to WV.

You set up this filter by dragging the ST field from the CUST table to the top-left cell of the Criteria pane, and then by expressing the filter you want to use. You tell MS Query what value you want this field to be equal to by typing the value in the second line of the criteria pane. In this case, you type WV. (MS Query adds single quotes around WV when you move off the cell.)
On the other hand, if you wanted to show sales everywhere except West Virginia, you could enter the expression, <> WV in this cell. This would return all records where the state code does not have the value WV.
Please note that these criteria are not case sensitive when you query Excel files, but they might be case sensitive when you query other data sources. For example, queries against an Oracle or SQL Server database may be case sensitive, depending on how your database is set up.
Next, you need to tell MS Query which columns you would like to see in our Excel report. For this exercise, let’s choose to see the customer number, the customer’s last name, the type of customer (cash or credit), the amount of the order, the delivery date, and the name of the sales rep. To do this, double-click on the fields in the tables shown in the following figure, and they’ll appear as headings in the data grid.
After you’ve added all the fields you want, click on the Query Now button, shown here. The data will be returned in the data grid, as shown in top few rows of this figure.

Note that the data grid isn’t limited to 65,536 rows. If you suspect the dataset you’ve returned is larger, you can check this by clicking on the “Last Record” button at the bottom of your window; it’s the right-most button shown here. Here, for example, the query produced 140 records.
Now would be a good time to save your query. This will allow you or another person to use the same query later in a new workbook, with additional data, or both. To save the query, choose File Save As in the Microsoft Query window and then name your query anything you want. In the File Save As dialog you’ll see two file formats, dqy and qry. If dqy is specified as the default, use that format. The qry file format was used in earlier versions of the tool.
At this point, you may be curious to know what the SQL statement you just generated looks like. When you click on SQL toolbar button shown here you can see the SQL statement in the SQL window. If you know SQL, you can edit the statement to add features that are not supported by the generator, but are supported by the ODBC driver you’re using.

Export the Data to Excel
If the data in the grid is what you want to export to Excel, click on the Return Data button, shown here.
You’ll be returned to Excel, and the Import Data window will let you decide where you want to put the data. For this example, I’ll accept the defaults, and put the data in the existing worksheet in Column A, Row 1, by clicking the OK button.

You now can apply any formats, formulas, and so on, that you wish.


Leave a Reply