How to Adjust Margins in Excel
Margins are the blank spaces around the edges of a printed page. They can be adjusted to fit your needs, such as the size of your worksheet or the printer you are using.
Default margins
Predefined normal margins sizes are 0.75” top and bottom, 0.7” left and right and 0.3 for a header and a footer.
Wide margins sizes are 1”, 1” and 0.5” accordingly.
There are 0.75”, 0.25” and 0.3” for Narrow margins.
Adjust Margins
In Excel, you can choose from several pre-defined margin settings, including Narrow, Wide, and Normal. You can also create custom margins by specifying the values for the top, bottom, left, and right margins. To set your own margins follow below steps.
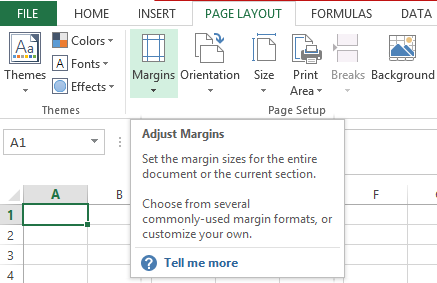
Click on Page layout tab. Click on “Margin” tab and select the margin you want from the drop down menu.

Select the margin you want.

Note: You can click on the “custom Margins” to further customize the margin.

Here’s the place when you can change margins and set your custom ones. To create custom margins, select the “Custom Margins” option from the Margins drop-down menu, and then enter the desired values in the Page Setup dialog box.

Once you’ve set the margins, you can preview the changes in the Print Preview mode to see how your worksheet will look when printed. This can be helpful for checking that all the data will fit within the printable area, and that the margins are set to your liking.
After the change you will get page layout customized to your needs.
You are able to choose between horizontal and vertical orientation at this point.
Printing options
Clicking Options will let you define even more things. You will be redirected from Excel application to the printing settings of your printer device.

I am using HP printer so I was redirected to HP Smart application.
There are so many possibilities that you will be able fulfill your need. This will happen on your printing device end because Microsoft decided that the printer will allow you to tweak more settings that Excel is able to.


Leave a Reply