How to create Data Entry Form?

In this Excel tutorial, you learn to create a data entry form in Excel. This will be useful for people who are using Spreadsheet as a database. Especially when the spreadsheet is being shared across many users.

Creating a data entry form in Excel can make it easier to enter and manage data in a structured way.

Why to create a data entry form?

Let us discus why we need a data entry form. Suppose we enter in an Excel file daily there are chances to errors. These are the 2 issues we face:

  1. It’s time-consuming. You need to enter the data in one cell, then go to the next cell and enter the data for it. Sometimes, you need to scroll up and see which column it is and what data needs to be entered. Or scroll to the right and then come back to the beginning in case there are many columns.
  2. It’s error-prone. If you have a huge data set which needs 40 entries, there is a possibility you may end up entering something that was not intended for that cell. Data form provides additional data validation.

Hence it is better to user from control to avoid these 2 mistakes. Let us start creating the data for the same which we generally add daily. Now think of some one adding this daily data. Let us create the set up for data entry form control in Excel:

  1. Right-click on any of the existing icons in the Quick Access Toolbar.
  2. Click on Customize Quick Access Toolbar:

Customize Quick Access Toolbar

How to create a form in Excel?

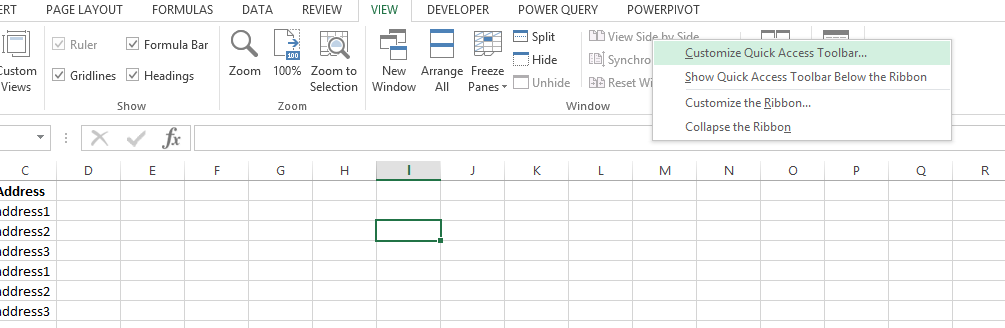
Using the Quick Access Toolbar

Now Select “All commands” and find “form”.

Data Entry form All commands

Click add to add it to the toolbar:

data entry form add it to the toolbar

Once the form is created, you can use it to enter data into your Excel worksheet. To access the form, simply click on the “Form” icon in the “Quick Access Toolbar” or use the keyboard shortcut “Ctrl+Shift+*”.

See also  How to do the win loss data analysis using Quick Analysis?

Here’s what will show up at the top of the window in the top left corner of the screen:

data entry form icon added to ribbon

Now select the data and click this form button:

click form

We have this standard form control to be used right away for data entry.

Using the Developer tab

Another method to create a data entry form in Excel is by using the Developer tab. Here are the steps:

  1. Enable the Developer tab if it is not already visible. Go to File > Options > Customize Ribbon and check the Developer box in the right-hand list.
  2. Go to the Developer tab and click on the “Insert” button in the “Controls” group.
  3. In the “ActiveX Controls” section, select the “Text Box” control (or any other control you want to use).
  4. Click and drag on the worksheet to draw a box where you want the data entry form to appear.
  5. Right-click on the text box and select “Properties.”
  6. In the “Properties” dialog box, enter a name for the text box and any other properties you want to set, such as maximum and minimum values or default text.
  7. Repeat steps 3-6 for each field you want to include in the form.
  8. Once you have created all the text boxes for the form, go to the Developer tab and click on the “Design Mode” button to exit design mode.
  9. Your data entry form is now ready to use. To enter data, simply click on the text boxes and type in the information.

Note: This method allows for more customization of the data entry form, but it requires a bit more work than the previous method.

Using the Table feature

Another method to create a data entry form in Excel is by using the built-in Excel table feature. Here are the steps:

  1. Select the data range that you want to include in the table.
  2. Go to the “Insert” tab and click on “Table” in the “Tables” group.
  3. In the “Create Table” dialog box, make sure the range is correct and check the box for “My table has headers.”
  4. Click “OK” to create the table.
  5. With the table selected, go to the “Table Tools” tab and click on “Form” in the “Tools” group.
  6. The data entry form will appear, with fields corresponding to each column in the table.
  7. You can enter data into the form by clicking on the field and typing in the information.
  8. To add new rows to the table, click on the “New” button in the form.
  9. To save the data, simply close the form.
See also  How to Do an Exponential Regression in Excel to Predict Future Values

Note: This method works best when the data is already in a table format, and it allows for easy addition of new rows to the table. However, it is less customizable than the previous methods.

Using the UseForm feature

Another method to create a data entry form in Excel is by using the “UserForm” feature in Visual Basic for Applications (VBA). Here are the steps:

  1. Enable the Developer tab if it is not already visible. Go to File > Options > Customize Ribbon and check the Developer box in the right-hand list.
  2. Go to the Developer tab and click on the “Visual Basic” button in the “Code” group.
  3. In the VBA editor, go to Insert > UserForm.
  4. Drag and drop the controls you want to include in the form (e.g., text boxes, combo boxes, etc.) from the “Toolbox” onto the form.
  5. Customize the appearance of the form and its controls using the properties window.
  6. Add code to handle the data entered into the form and to control how the form behaves.
  7. Once you have finished designing the form, close the VBA editor and go back to Excel.
  8. To launch the form, create a button or a keyboard shortcut that calls the form using the appropriate VBA code.

Note: This method allows for the most customization of the data entry form, but it requires knowledge of VBA programming. It also allows for more complex behaviors, such as automatic data validation, error handling, and data processing.

There are several methods to create a data entry form in Excel, each with its own advantages and disadvantages. The easiest method is to use the built-in form feature, which is quick and easy to set up.

See also  How to Interpolate in Excel: Estimating Values within Data Ranges

Another method is to use the Developer tab and insert text boxes, which allows for more customization. The table feature in Excel also allows for creating a simple data entry form, which is useful when the data is already in table format.

The most complex and customizable method is to use the VBA UserForm feature, which requires programming skills. Depending on your needs and level of expertise, you can choose the method that works best for you.

Key Takeaways

There are several methods to create a data entry form in Excel, each with its own advantages and disadvantages.

The easiest method is to use the built-in form feature, which is quick and easy to set up.

Another method is to use the Developer tab and insert text boxes, which allows for more customization.

The table feature in Excel also allows for creating a simple data entry form, which is useful when the data is already in table format.

The most complex and customizable method is to use the VBA UserForm feature, which requires programming skills.

FAQ

Q: What is the difference between a data entry form and a table?

A: A data entry form is a graphical user interface (GUI) that allows users to enter data into a spreadsheet. A table is a collection of data organized in rows and columns.

Q: Which method is best for creating a data entry form?

A: The best method for creating a data entry form depends on your needs and level of expertise. If you need a simple form that is quick and easy to set up, then the built-in form feature is a good option. If you need more customization, then the Developer tab or the table feature may be a better choice. If you need the most complex and customizable form, then the VBA UserForm feature is the best option.