How to Make a Grid in Excel with Equal Row and Column Width
In this article, you will learn to create a grid in Excel:
Table of Contents
How to make a grid paper?
The trick is to square up the cells. The specific grid cell dimensions matter less for grid formatting than achieving consistent square cell proportions for the grid layout. Like graph paper, a cell can equal anything you want. The hard part is getting the width and height settings to produce a square because there’s no easy way to match a cell’s height and width settings. You can’t just set the row height and column width to the same value because:
- Excel measures cell row height in points, which affects how tall each row appears in your grid formatting and cell dimension calculations.
- Excel considers the current font when calculating column width; a column width of 5 means that the column will display 5 digits, using Normal style.
You could spend a lot of time tweaking the height and width and you could even try holding a ruler up to your screen, but there’s an easier way. Format an AutoShape as a square and use it as a guide. First, you need to insert and format an AutoShape as follows:
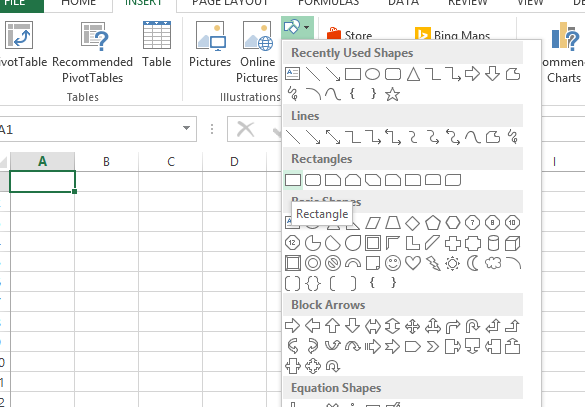
Inserting a rectangle autoshape
From the Drawing toolbar, choose Basic Shapes from the AutoShapes drop-down list Insert this rectangle to the first cell A1:

Right-click on the rectangle and select size and properties:

Make width and height equal as per your requirements:

Select all cells and make the dimensions equal to the shape:

We can add borders to make it look good.

It is important to note that while the above steps will create a grid-like pattern in Excel, it will not create a true grid in the sense of a structured table with columns and rows. To create a structured table with columns and rows, you can use the Table feature in Excel.
To create a table, select the range of cells that you want to include in the table and then click on the Insert tab in the ribbon menu. In the Tables section, click on Table.

Leave a Reply