How to Insert Rows in Excel Automatically
Adding functionality to Excel using VBA can greatly enhance your productivity and automate repetitive tasks. Thanks to this free vba code, you will insert an ActiveX Control which will add rows to your table automatically. Your worksheet gains some code and you will save a lot of time.
Pivot table data preparation
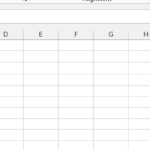
Consider the data. Go to ribbon. Click Developer > Insert and from ActiveX Controls choose a Command Button.

Draw a button like shown below.

How to auto insert row?
Right-click the command button and choose Properties.

In the Caption field change the text to Add Row.

When you double click the button, a form will appear like this below.

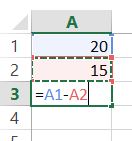
Put the code in like shown below. While keeping in mind the sheet name, range according to your data.
Private Sub CommandButton1_Click()

Sheets("Sheet1").Range("A4").Select
ActiveCell.EntireRow.Insert Shift:=xlDown

Sheets("Sheet1").Range("A4:E4").Select
Selection.Borders.Weight = xlThin

End Sub

Click the Design mode to off design mode.

Every time you click the Add Row button, a new row will be added in your data like shown below.

The provided VBA code is a basic example. You can enhance it to meet your specific requirements. For example, you can customize the range, formatting, or actions that occur when a new row is inserted.
You can expand the functionality of your Excel workbook by incorporating more ActiveX controls. For instance, you could add buttons for deleting rows, performing calculations, or navigating between sheets.

Leave a Reply