How to Use Multiple Linked Drop-Down List in Excel
Inserting multiple drop-down lists that are somehow linked together in Excel is very simple. It is about having the understanding of what is linking these lists together. We are going to create the lists together and further insert the drop-down list.
Creating the multiple linked drop-down list
In this step, we are going to create the list that we will use while we develop the multiple linked drop-down list.

Here is where we have provided the things that would link these lists together. You are free to decide what you would like to link these lists together.

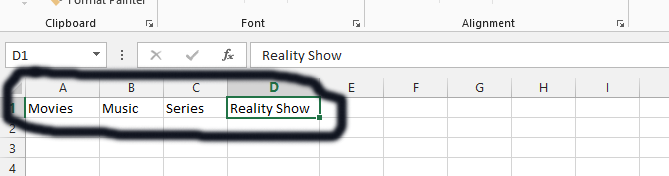
In this step, we have placed the genres for movies, music, series, and reality shows. These lists are solely meant to explain the things that are linked to what has been created before. In this step, it is important to make sure that you do have specific information about what you will be linking, with regards to what you have chosen at the beginning.
Naming the Range
In this section, we are going to create a name for the ranges.
You should just mark the top row, just like you see in the picture. You should write the two words title, for example Reality Show should be RealityShow.

With that row marked, you should click on the box that is marked in black, and write down what these lists are all about. We have labeled them as Services.

We are going to label each of the rows with caution. The first thing we are going to do is mark the list that is beneath the top row. In number 1, we have just marked the rows between action and crime. Now write the name of the range, as you have seen in number 2. You should repeat these steps with the rest of your lists.

Tip: You should write the range name together (especially if it is two words). This was the case with the “Reality Show”.
Validating the Data
We are going to start doing different things that make it possible for the multiple linked drop-down list to start validating and taking effect in what we have been working on together.
The first thing you need to do now is click on an empty column, and then choose data, which is marked in black and labeled as number 1, and then choose data validation, which is labeled as number 2.

The first thing to do is click on beneath allow, which shows any value and is labeled as number 1, and then choose list, as it is labeled as number 2.

Type in the main source of the title. In the area marked in black, we have written “=Services”, which is the same thing we already wrote.

Repeat the two previous steps and click on the source field, as it has been marked in black in the picture shown above. Type in =indirect (write the column that you have placed in the first drop-down list). You should write them together and then click OK.

Tip: You should click on a blank column that is exactly beside the drop-down list you already created.
Final Creation
We have just created multiple linked drop-down lists, and if you choose from any of the available lists, you will see the available list. As you have seen, there is Hip-Hop showing beside the Music, as it is the linked drop-down list to Music.

If you need to add new genres or categories later, simply add them to the appropriate column in your source data.


Leave a Reply