How to Reverse List Order in Excel
Reversing the order of a list in Excel can be done in a few different ways, depending on how complex your data is and what you’re looking to achieve. Let me walk you through a few simple approaches that should get the job done.
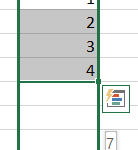
First up, there’s a quick method using a helper column. What you do here is place a new column next to your list, like if your list is in column A, use column B for this. Then, you number that helper column, matching it to the rows of your list. So if you have 10 items, you’d number the helper column from 1 to 10. Once that’s set, just sort your list by this new column in descending order. This flips the list upside down. After that, you can delete the helper column if it’s not needed anymore.
Another approach is using Excel’s INDEX function. This method works if you want the original list to stay intact and create a reversed version in another column. To do this, you can write a formula in a new column that pulls data from your original list but in reverse order. The formula automatically adjusts, so as you drag it down, it keeps reversing the entries from the original list.
Lastly, if you want something more advanced or need to work with a larger set of data, Power Query is the way to go. You start by selecting your list, then head over to the Data tab and open Power Query. In there, you can reverse the rows with just a couple of clicks. After that, load the reversed list back into Excel, either replacing the original or adding it as a new table.
Each method has its advantages, and it really depends on what you’re trying to do. Whether you’re looking for a quick fix or need something more dynamic, Excel’s got a solution for reversing your list.


Leave a Reply