How to Move Rows in Excel
Moving rows in Excel is a fundamental skill that streamlines data organization. We’ll explore four methods to achieve this seamlessly.
Method 1: The Mouse
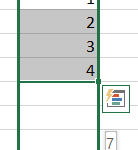
Begin by selecting the rows you wish to move.
Click and hold on the selected rows, then drag them to the desired location. Release the mouse button to drop them in place.
Method 2: Keyboard Shortcuts
Highlight the rows you want to relocate.
Press Ctrl+Shift along with the arrow keys to shift the selected rows to the new destination.
Method 3: Using the Home Tab
Select the target rows.
Cut and Paste:
- Go to the Home tab.
- In the Cells group, click Cut.
- Click on the cell where you want the rows to land.
- Again, on the Home tab, select Paste.
Method 4: VBA Code (For Advanced Users)
If you’re comfortable with VBA (Visual Basic for Applications), you can automate row movement using code. Here’s an example:
Sub move_rows()

Dim rowsToMove As Range

Dim destinationRow As Long

Set rowsToMove = Range("A1:A5")

destinationRow = 10

rowsToMove.Cut Destination:=Range("A" & destinationRow)

End Sub
This code shifts rows 1 to 5 to row 10.
Choose the method that suits your needs best, and you’ll be effortlessly moving rows in Excel to enhance your data organization.
Tips:
- Ensure that the destination area has enough space to accommodate the moved rows.
- Take care when using drag-and-drop to prevent accidental movement of data.
- Make sure you don’t drag rows on top of other data. That will replace it.


Leave a Reply