How to Assign a Macro to a Button in Excel
In this Excel tutorial, you’ll learn how to assign a macro to a button in Excel, making it easier to run tasks with a single click.
Creating a Button
Let’s begin by inserting a button in Excel that will later run a macro.
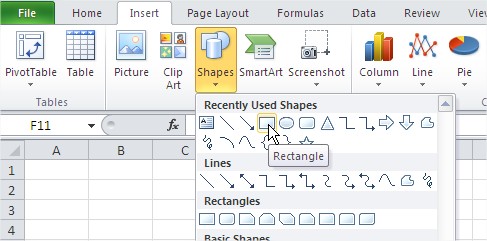
To create a button, go to the Excel Ribbon, click Insert > Shapes, and choose the Rectangle shape.

Draw the shape on your worksheet and give it a name, like ‘Run Report’, to identify the macro button.

Assigning a Macro
Now, right-click the shape and select Assign Macro from the context menu.

The Assign Macro dialog box will appear – choose the macro you want to link to the button.

Your macro is now assigned to the button. Simply click the button to run the macro in Excel. After customizing your Excel macro button, test it by clicking to ensure the assigned macro runs correctly. The macro you assigned should run, and you should see its effects in the worksheet.
Unassigning a Macro
To unassign a macro from the button, right-click the shape and choose Assign Macro from the list again. In the Assign Macro dialog, delete the macro name and leave the field blank to remove the assignment.

These simple steps allow you to assign or remove a macro from a button in Excel with ease. This efficient approach allows you to execute frequently used macros swiftly, bypassing the macro dialog box and optimizing your productivity.


Leave a Reply